This one is a tutorial for the Dotted French I wore last week. Hope you enjoy :)

 | Supplies For this manicure I used: - 4 Polishes: Zoya Grace for the base, Wet n Wild Frech White Cream for the tip, Wet n Wild Black Cream for the flowers, and Sally Hansen Celeb City for the flower centers - Transparent Scotch tape - dotting tool |
 | Step 1 - Paint your nail using 1-2 coats of base color - Allow to dry completely so that you can apply and remove tape without ruining the manicure |
 | Step 2 - Apply Scotch tape, leaving the free nail edge uncovered |
 | Step 3 - Paint the tip of the nail using white |
 | Step 4 - Quickly remove the tape Note: When doing a full manicure, repeat steps 3 and 4 on each finger individually. Do not wait until all tips are painted before removing the tape or you will not get a clean edge. |
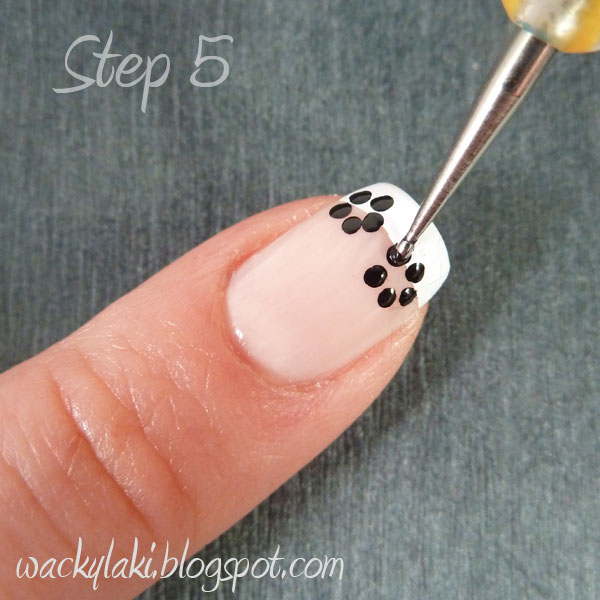 | Step 5 - With a dotting tool, create 5 dots in a circle to form the flower |
 | Step 6 - Repeat step 5 to make as many (or as few) flowers as you would like |
 | Step 7 - With the silver color place a center dot in each flower |
 | Done! - Apply a top coat and enjoy! :) |
I'd love to hear your comments!
Thanks for looking!
Anutka :)


