Each time I do create of these manicures I get questions about cleaning under the nail after painting or people tell me that they are afraid to try and make a mess. I thought I would put together this tutorial to show how I tape off my nails to avoid the mess and make painting the underside of the nail a little easier. I hope you find it useful and give this double sided look a try...
Supplies:
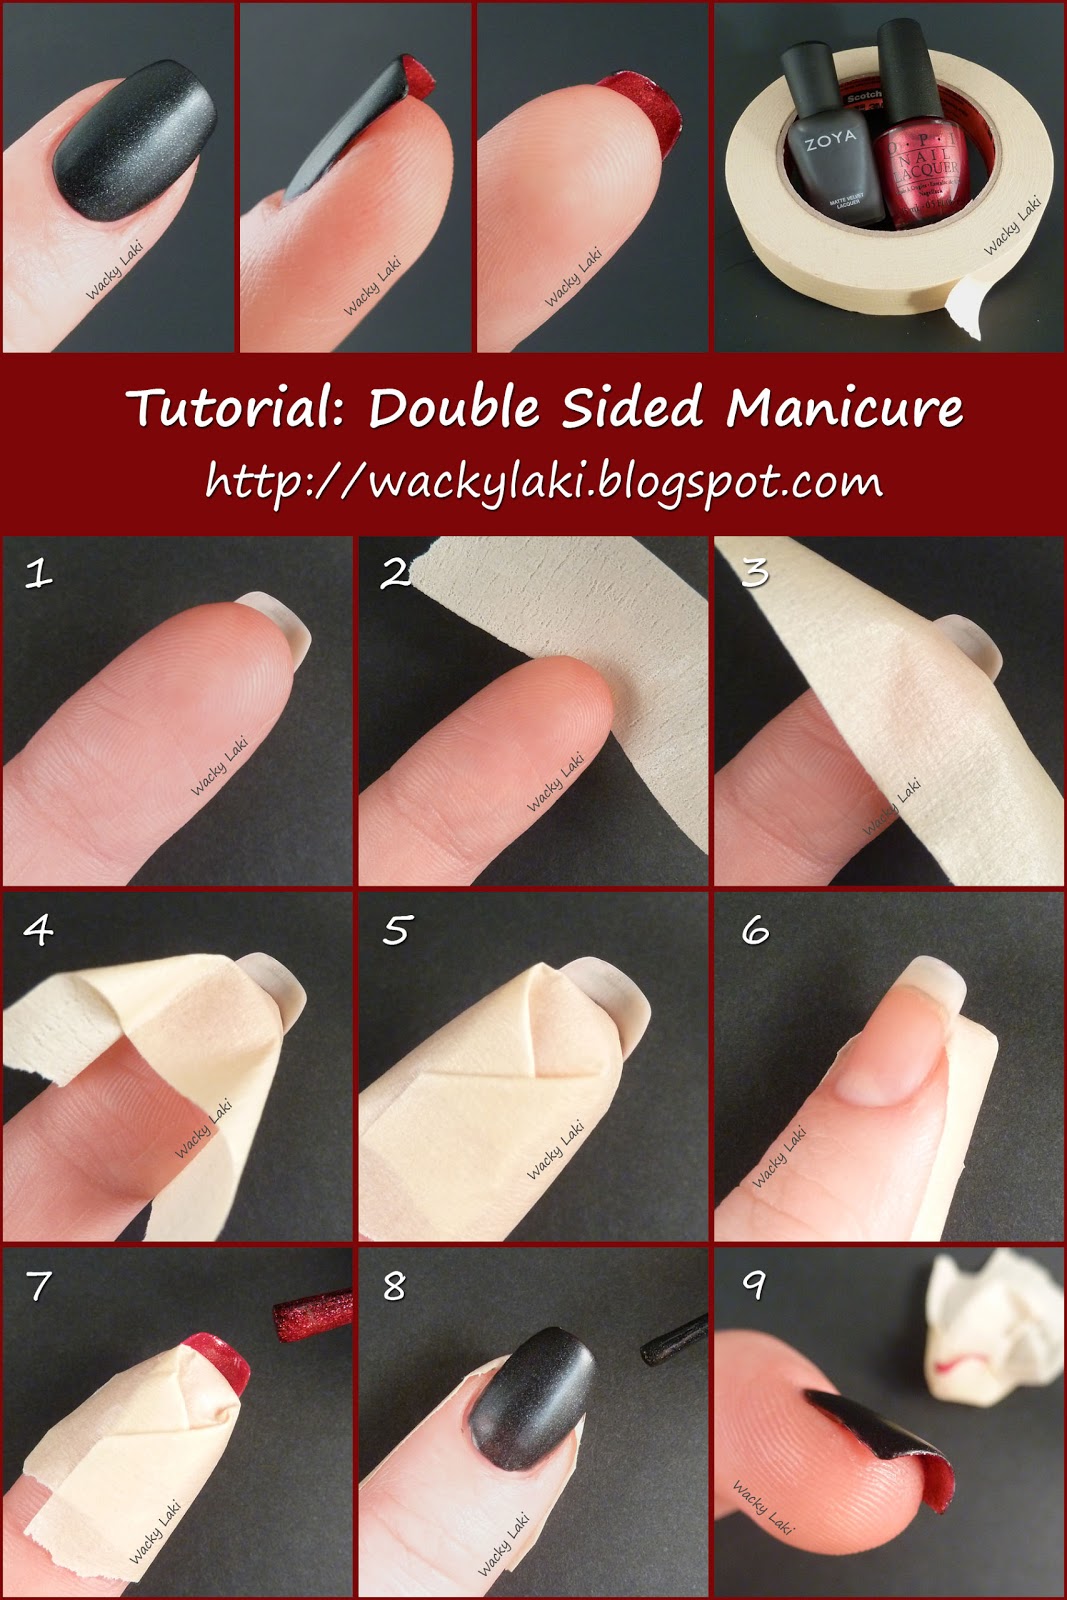
- Two polishes of choice. I'm using Zoya Dovima on top and OPI You Only Live Twice underneath.
- Tape (clear tape, masking tape, painters tape, etc...)
Steps:
Instructions:
- Start out with clean dry nails
- Slip a piece of tape between the nail and the finger to run along the nail line
- Fold the tape down over the finger
- Fold the sides down along the finger, avoid covering the front of the nail
- Fold the two flaps down, one over the other, to keep them out of the way
- This is what it will look like from the side, a little tape hat for the finger.
The front of the nail is not covered and the back of the nail is taped off and held away from the nail - Paint the underside of the nail in chosen color. Repeat for a desired number of coats
- Paint the top of the nails in the desired color as usual
- Allow everything to dry and remove the tape.
Enjoy your mess free double sided manicure!
Here are some examples of what I have done in the past. Click on the images to go directly to the post...


Let me know what you think of this and don't hesitate to ask questions if something is not clear!
Thanks for looking!
Anutka :)


