Supplies
- Nail polish in two contrasting colors
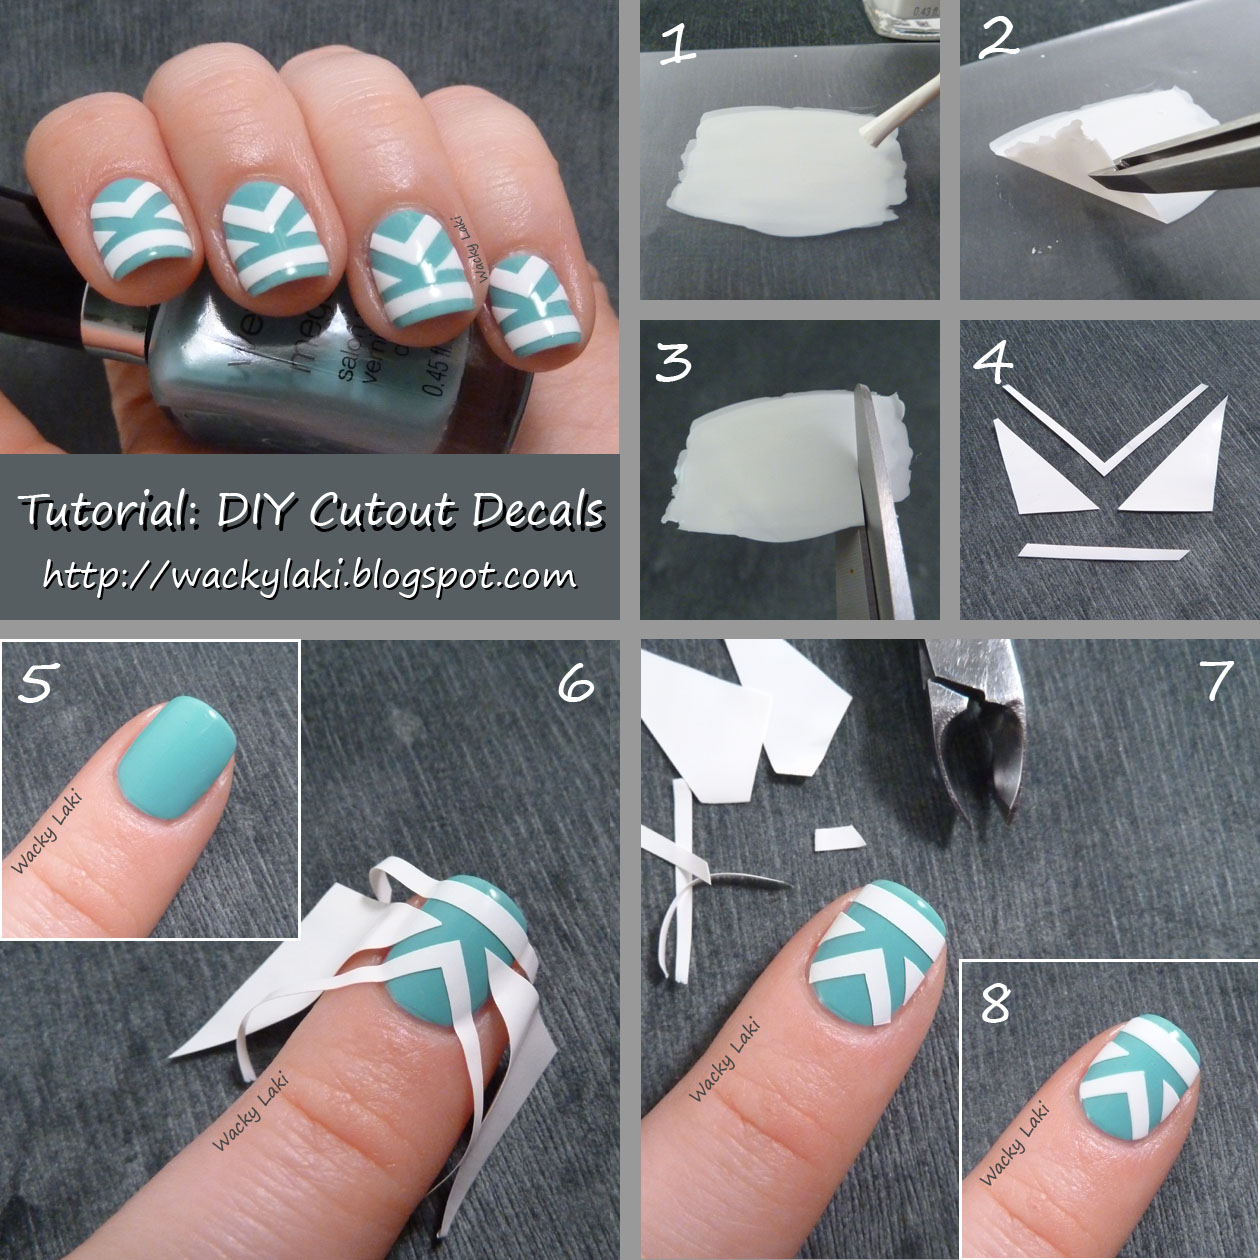
(used here Wet 'n Wild I Need a Refresh-Mint and French White Creme) - Ziplock bag
- Scissors
- Cuticle Nipper
Insutrctions
- Using white nail polish, paint a rectangle about 1.5x larger than your nail on the ziplock bag.
- Apply a second coat if needed to reach full opacity.
- Allow to dry completely (I usually let this dry overnight) - Peel the sheet of nail polish off the ziplock bag. Sometimes it helps to use tweezers to get it started, but it should peel off easily once a corner is lifted.
- Using scissors, cut out the decals as shown above
- The cutout decals should look approximately as shown in Step 4.
- Apply desired number of base color coats.
- When the polish is still slightly tacky, but not wet, apply the decals to the nail as shown above.
- If you are starting out with an existing manicure that is already dry, apply a coat of clear polish and allow it to get tacky for decal application...
(Please excuse the extra large decals I created... they certainly don't have to be this big :) ) - Using cuticle nippers, clip the decals as close to the cuticles as possible
- Clean up the edges as needed. If you didn't clip as perfectly as you wanted, take a look at the cleanup tutorial on how to get a clean line near the cuticle. Since the decals are made of nail polish, they should easily dissolve and clean up with acetone/nail polish remover...
- Apply a top coat and enjoy :)
I hope you enjoyed this tutorial! I would love to know what you think of it...
As always, if you try this or any of my other tutorials/manicures, I would love to see your creations :)
Thanks for looking!
Anutka :)


