Violet Beauregard Inspired...

Tuesday, April 30, 2013
Today I have a very special reader requested manicure to share with you. A few days ago I got a request for a manicure inspired by the outfit of Violet Beauregard from the original Willy Wonka movie. I pried a little as to the significance of this particular movie character for her, partly because I was curious and partly to draw inspiration. The answer was simple, she has autism, she loves Violet, and these happen to be her school colors. Enough said!


To create this manicure I started out with a bit of Liquid Palisade (LP) covering the half moon of each nail. I must really be determined to see how manicures I can get out of the little tube since I seem to be using it a lot lately. I then painted the nails with Barielle Blue Capri (full swatches coming soon) and removed LP. Using a detail brush and OPI OPI...Eurso Euro, I added the dark blue collar. Using red acrylic paint, I added the red stripe for a belt and accented the belt with a gold rectangular stud from the BornPrettyStore. I painted the center of the stud using Barielle Big Apple Red. The 'buttons' are little gold studs that I got from Cult Nails a while ago...


Next to the inspiration character herself... :)


Thank you to my lovely reader for this request! I hope you like it.

Thanks for looking!
Anutka :)


** Polishes were provided to me for review by the manufacturer or their PR. **
** For more information please see the disclosure policy **

Nicole by OPI Kellogg's Special K Lacquers...

Monday, April 29, 2013
Today I would like to show you three Nicole by OPI lacquers created in collaboration with Kellogg's Special K to encourage women to “show off your confidence with color.” The shades are available with proof of purchase of eligible Special K products. I had fun creating color blocking nail art with the three shades and of course couldn't resist taking a photo with my favorite Special K Red Berries cereal...


The manicure features three Nicole by OPI shades: Be Ama-zing! (teal), Challenge Red-y (red) and Pros & Confidence (pink). Full swatches of the three shades are below....

To create the look I started out with a base of the pink Pros & Confidence. After arranging the striping tape how I wanted on the nails, I painted desired sections using Be Ama-zing! and Challenge Red-y. I quickly removed the striping tape before the polish dried and replaced it with a fresh piece of striping tape to create sharp lines...


I don't often do color blocking manicures, but I really like how these colors play together. I initially wanted to use black striping tape, but discovered that I don't actually own any black striping tape. I am sure you are just as shocked as I was to find that out. I opted to use silver as an alternative and love the way it turned out...


Be Ama-zing!
A teal blue cream. This actually has a bit more greenish tint to it than what shows in the photos. It provides almost complete coverage at just one coat, but I did use two to even everything out. Very nice and smooth formula, easy to apply. This does stain the nail even with a base coat, so it was a bit disappointing since the color is so gorgeous. Swatches are with no top coat...


Swatch Details
Brand: Nicole by OPI
Collection: Kellogg's Special K Collaboration
Color Name/Number: Be Ama-zing!
Number of coats: 2
Top Coat: No

Free of Formaldehyde, Toluene, Dibutyl Phthalate (DBP)

Challenge Red-y
A deep red cream/jelly. A classic red shade that I like a lot. Great formula and good coverage at just two coats. No problems with application. Swatches are with no top coat...


Swatch Details
Brand: Nicole by OPI
Collection: Kellogg's Special K Collaboration
Color Name/Number: Challenge Red-y
Number of coats: 2
Top Coat: No

Free of Formaldehyde, Toluene, Dibutyl Phthalate (DBP)

Pros & Confidence
A bright pink cream. Perfect summer shade. The formula is very smooth and creamy, easy to apply. It provides full coverage in two coats, which is what I have in my swatches. No top coat in the swatches...


Swatch Details
Brand: Nicole by OPI
Collection: Kellogg's Special K Collaboration
Color Name/Number: Pros & Confidence
Number of coats: 2
Top Coat: No

Free of Formaldehyde, Toluene, Dibutyl Phthalate (DBP)

For more details on how to get these polishes, visit Nicole by OPI Special K Challenge page or the Kellogg's rewards website...

Thanks for looking!
Anutka :)


** Polishes were provided to me for review by the manufacturer or their PR. **
** For more information please see the disclosure policy **

Sunday Stamping: Inspired by Shoes...

Sunday, April 28, 2013
Today's Sunday Stamping challenge in Adventures in Stamping is to create a manicure inspired by a favorite pair of shoes. None of the shoes that I own have stampable (let's pretend that's a word) patterns, so I resorted to finding a "favorite" pair online. Luckily, nowhere in the challenge did it mention that I had to own the pair of shoes that inspired me. Since my nails are long enough to flash their underside that could only mean one thing...


... Louboutin! The shoes with the red soles have inspired more than one manicure creation on this blog and I'm sure will continue to do so. In fact, I already have a few others lined up for replicating some day. Today's manicure was inspired by this wild pair...

To create this look, I started out with a base of Color Club Earthy Angel from the Back to Boho collection. I sponged over it with Color Club Positively Posh from the Untamed Luxury collection to create a mottled look at the tips. Then I stamped the leopard print with Wet 'n Wild Black Creme using Mash plate Mash-40.
Using Liquid Palisade, I blocked off the tips where I wanted to protect the stamping and painted the rest of the nail using Black Creme. After removing the Liquid Palisade, I finished off the tips with loose gold glitter and a matte top coat over the leopard print... How is that? Clear as mud?


I love how this turned out, but I wish I would have skipped the glitter just left it as leopard print on the tips. I'm not a bit fan of how the gold tips look on the shoes and should have taken the liberty of leaving them off the manicure as well. Maybe next time I'll remember to stop while I'm ahead.. :D ..


I little collage just because I just couldn't help myself :)


Thanks for looking and commenting!
Anutka :)


** Polishes were provided to me for review by the manufacturer or their PR. **
** For more information please see the disclosure policy **

Liquid Palisade Review...

Friday, April 26, 2013
I was recently given the opportunity to try out and review a product called Liquid Palisade. If you have not heard of it before, it is a product that has been described as painter's tape for the nails. After getting the chance to play around with it, I think it is so much more than that...


Liquid Palisade is a liquid that quickly turns to rubbery latex as it dries. It can be used to protect the cuticles from nail polish and then simply peeled off for quick cleanup. It can also be used for fun nail art instead of tape. The great thing about this is that it contours to the nail leaving no annoying gaps for polish to slip under as it can with tape. And the best part is that when dry, it can be gently pushed and shaped to the desired placement, in case you are not very steady with the brush!

It comes in a small lipgloss sized tube and has enough product for at least 50 manicures. The brush is very soft and easy to work with....


I tried it out in a few different ways...

I tend to avoid creating half moon manicures because I hate struggling with reinforcement stickers. At least the ones that I have never stick quite right and I always end up with polish seeping under them. This is a much easier and less frustrating way to achieve the same half moon look...

Note: Liquid Palisade changes color as it dries from lilac to a darker purple so it is easy to tell when it is dry. See the color difference in step 2. It is dry along the half moon edge and on the cuticle, but still wet in the middle of the half moon...


You know how much I love stamping, but there are some stamping polishes that are a pain in the behind to clean up afterwards. I can't even tell you how good it felt to just peel away the mess and not have to worry about cleanup. Granted, this isn't the messiest stamping example here, but it would work perfectly regardless. Notice in the 2nd step that I got a bit of the product on my polish, when I only intended to have it on the cuticles. When it was dry, I just moved it out of the way with another nail and it stayed put...


Obviously you can also do a combination of nail art and cuticle protection at the same time. I had to try it with sponging as it is one of the messiest manicures that I love to do. I added a few squiggly lines just for fun.  Everything peeled of beautifully leaving no mess behind (except where I didn't have Liquid Palisade)...


Water marble fans... hint, hint... cleanup doesn't get easier than this!

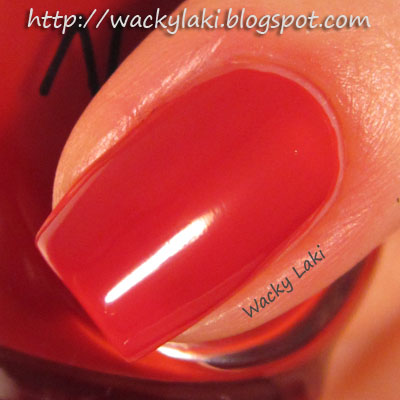
OK, I didn't intend for this to be a full manicure, but here are my three nail art attempts all together...


A few quick Liquid Palisade pointers...


Avoid if you have latex allergies!

For more information visit: http://liquidpalisade.com/

Thanks for looking and commenting!
Anutka :)


** Polishes/products were provided to me for review by the manufacturer or their PR. **
** For more information please see the disclosure policy **

Blue Flowers Over Holo...

Wednesday, April 24, 2013
This is a manicure that I wore a while ago, but am only now getting the chance to show it to you. Truth be told I'm sneaking it in here because I'm a bit behind on swatching what I had intended to show you today. Instead I hope to distract you with this sweet blue number...


The base of the manicure is the beautiful Color Club Over the Moon, a strong blue holographic stunner. I stamped the floral pattern from Nailz Craze plate NC 03 using OPI OPI...Eurso Euro. I adore this floral pattern and can see myself using it in lots of different color combos...


That's it for today. Expect more short little post in the next few days as I scramble to catch up :)

Thanks for looking and commenting!
Anutka :)


** Polishes were provided to me for review by the manufacturer or their PR. **
** For more information please see the disclosure policy **

OPI Goldeneye and the Bond Girls...

Tuesday, April 23, 2013
I would like to show you a manicure that I have been wearing this past weekend. It was inspired by this beautiful manicure created by Cutie-cles. I instantly fell for the contrast of textured polish against the smooth, sharp gold lines and added the manicure to my 'must try' list. Rather than copy the manicure, I put my own twist on it and used the new OPI Bond Girls Liquid Sand lacquers. Staying within the Bond family, I combined the two Bond Girls with a gold beauty from the Skyfall collection...


To start out the manicure, I used three coats of OPI Goldeneye. It is a clear base packed with gold flakes and provides full coverage in three coats. When the base was completely dry, I laid out the pattern using striping tape and painted alternating sections of the nails using OPI Jinx (orange) and OPI Vesper (black). I used two coats of each to build up opacity and quickly removed the tape before the polish started to dry.


The outcome was beautiful, but a bit too sharp and rough along the edges created by the Liquid Sand. Even though I love the textured polishes, I was worried that the sharp edges would drive me crazy.  Luckily after washing/drying my hands a few times, the towel friction wore down the sharpness making me one happy girl! I wore the manicure all weekend and loved it. Good thing I didn't get bored since I had no time to actually change it :)


Thanks for looking!
Anutka :)


** Polishes were provided to me for review by the manufacturer or their PR. **
** For more information please see the disclosure policy **